
How to connect Mailchimp to Genesis E-News Extended
This tutorial goes over how to connect the Genesis E-News Extended Plugin to Mailchimp. Most Genesis themes are prestyled to use this plugin and the great thing about it is you can use it in multiple widget areas on the site, with different lists in each.
The Steps
Step 1 – Install Plugin & Set it up
Install the Genesis E-news Extended plugin and locate where you would like to place it on the site.
The styling of your form will vary depending on your theme. For this example we are using the Hello Maker theme and the front page optin.
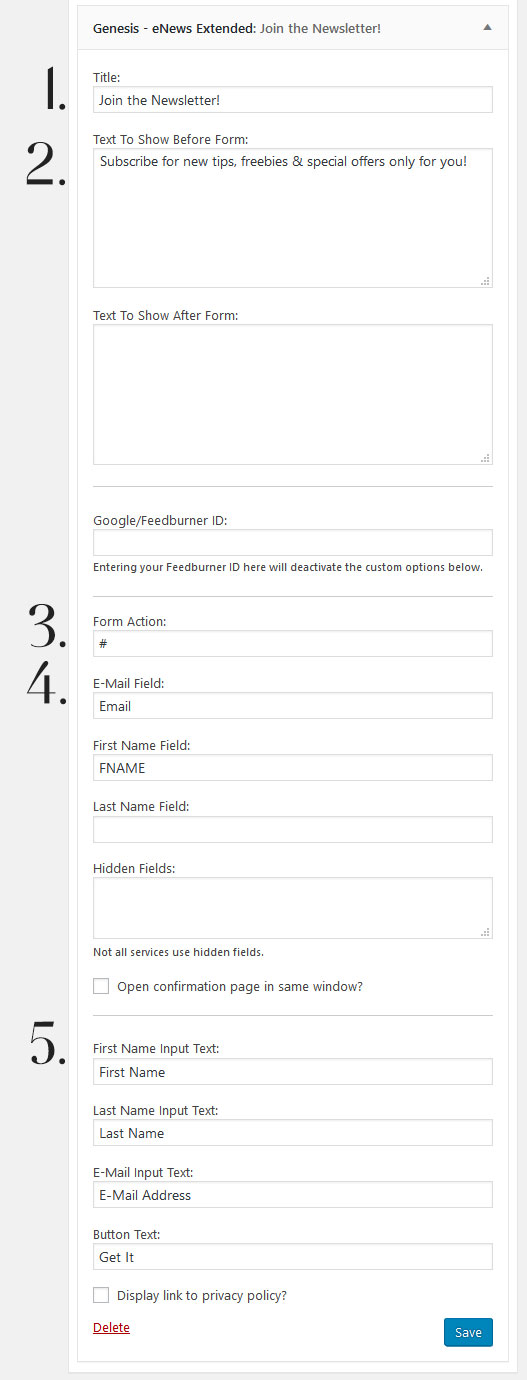
1 – Is your title
2- Is the description that will show on the form itself
3 – Is the form action. For now place a # symbol in this spot. After you are done setting up the form you will come back and place your “form action” in it. If you do not place anything in this spot, the input fields will not show on the front of the site when you go to preview your form.
4 – These 3 fields are what tells your provider about where to assign the information that comes in from your site. Your readers do not see this information. It is different for every newsletter provider. Mailchimp uses
EMAIL for the email input
FNAME for the first name
LNAME for the last name
The only one you are required to use is the email field. In Hello Maker it uses the first name input and email. If you leave the first or last name empty that input field will not show on the site.
5 – This section is what is shown on the front of the site. The first 3 choices are what is shown in the input field. The very last option is what the buttons says.
Step 2 – Log in to Mailchimp
Click on “Lists” then find your list, we only have 1 so it wasn’t hard. Then click on the arrow next to “stats”. A dropdown will appear and you will want to select “signup forms”

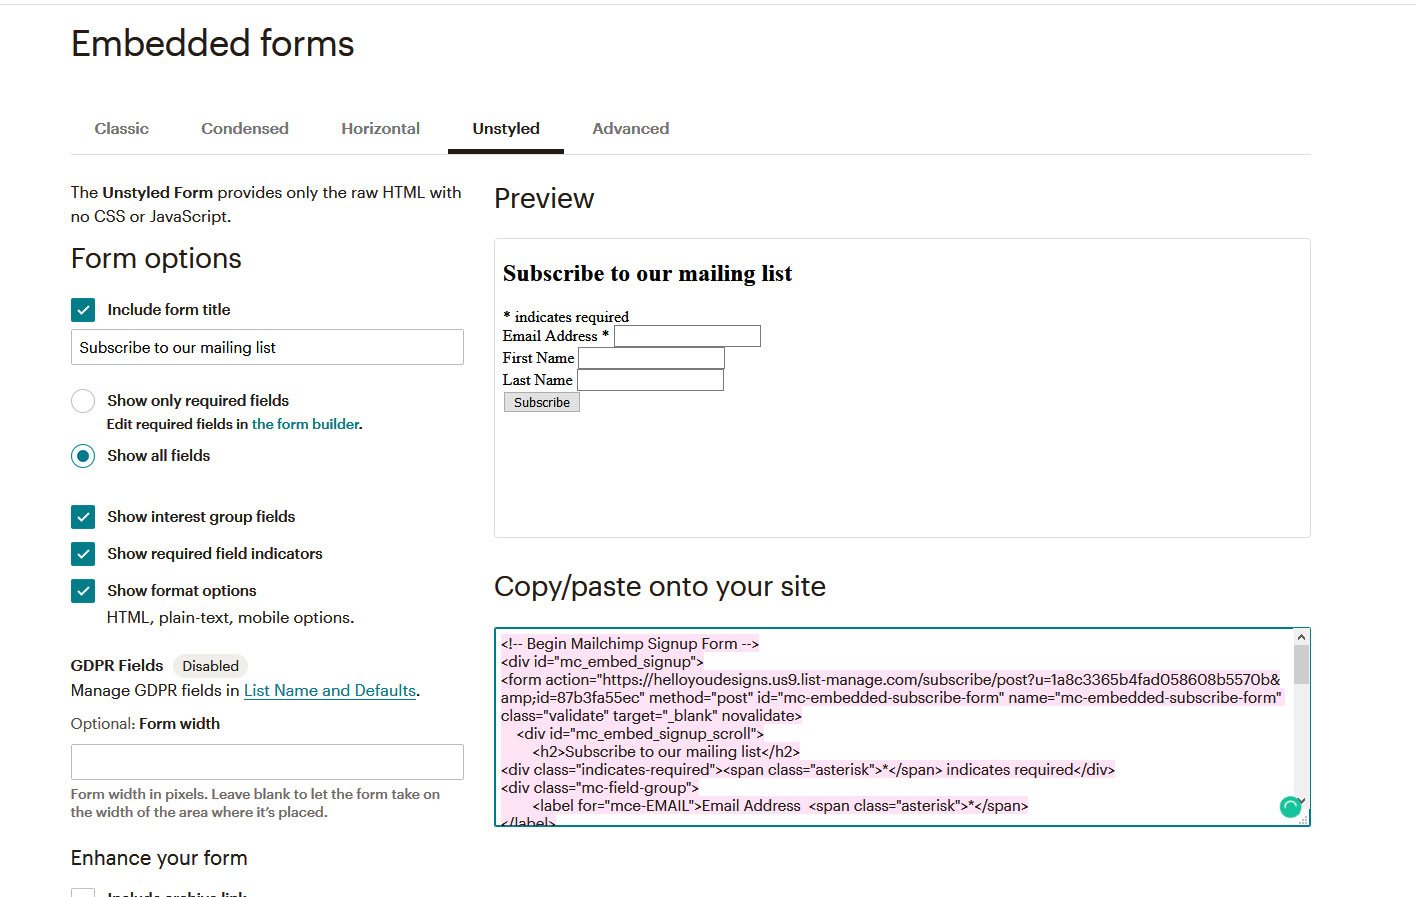
Next: Select the “Embedded Forms”

Next: Click on “Unstyled form” then highlight the information that is in the pink highlighted box. This is where you will get your “form action” that is needed to connect the site to mailchimp. Copy this information.
Step 3 – Get that Form Action
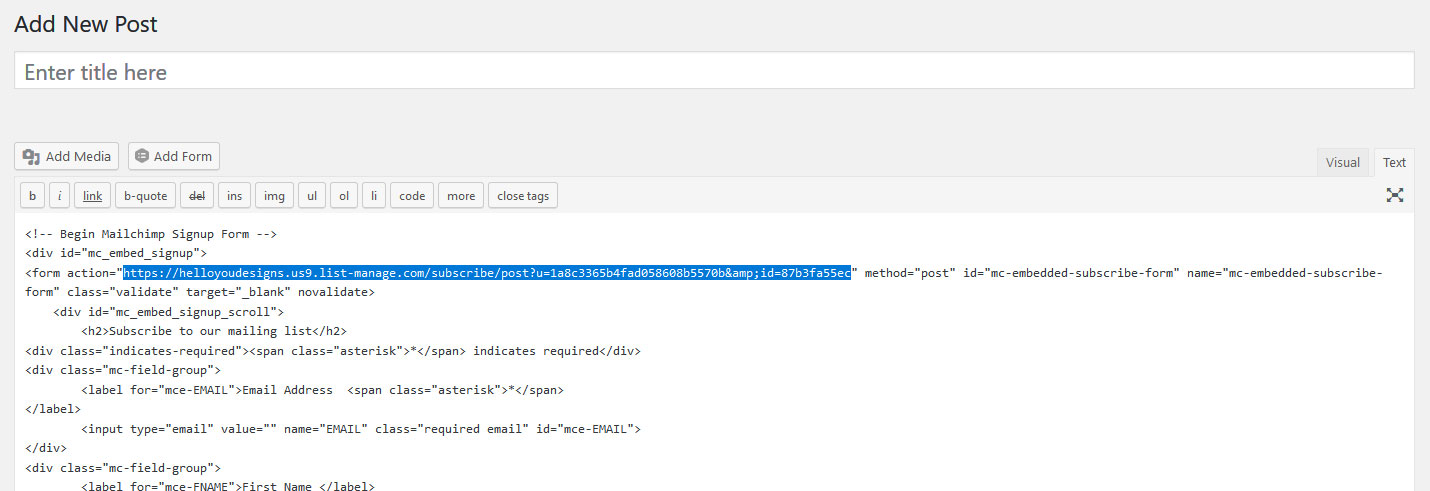
Open a new post, text editor or even a new email. Basically anything that you can paste the information in that you just copied. Once pasted look for the “form action” spot and copy everything inbetween the ” “.
Step 4 – Paste & Test
After you have copied your “form action”, head back to your widget and place the “form action” in the “form action” spot. If you have followed the steps above correctly your newsletter is now connected to your site. Test it to make sure everything works.
Trouble Shooting
I have a double signup
There are 2 reasons this will happen. The first is that you do not have the right input for your list in #4 on the form above. If you need “Fname” and are collecting “name”, your form does not know what to do with the data.
The second reason is that you may not be collecting all of the required fields your list wants you to collect. If this is the case go to step 2, where the Unstyled form is and click on Settings > List Merge Fields
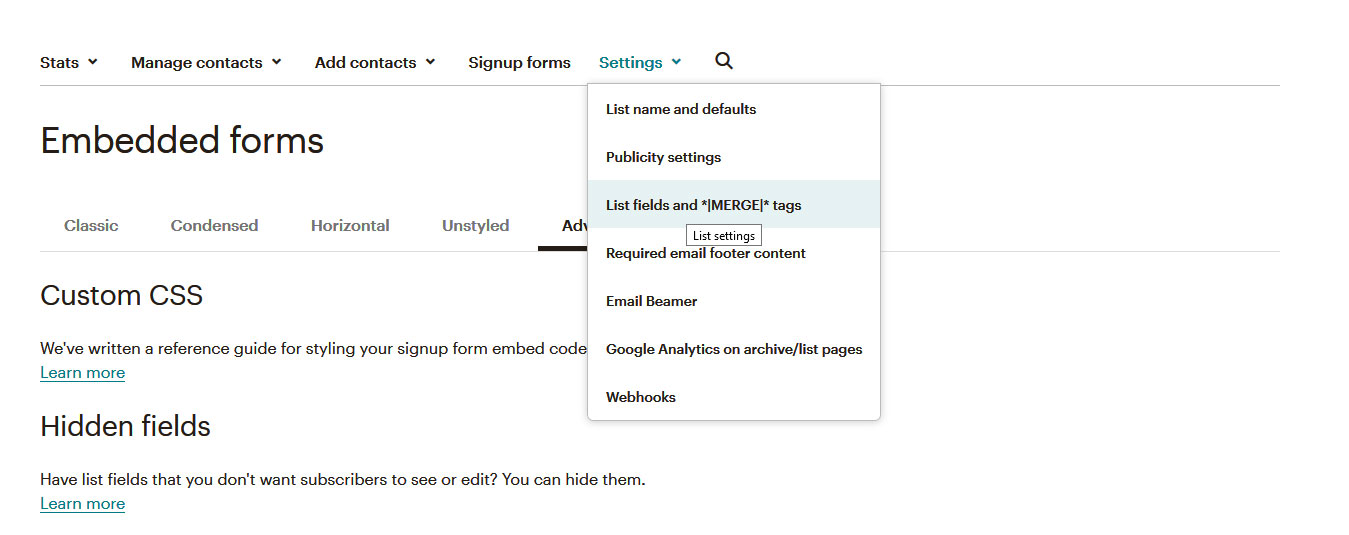
Then delete everything but the email field. If you have an optin that is not collecting all of the fields, you will not get a double optin.
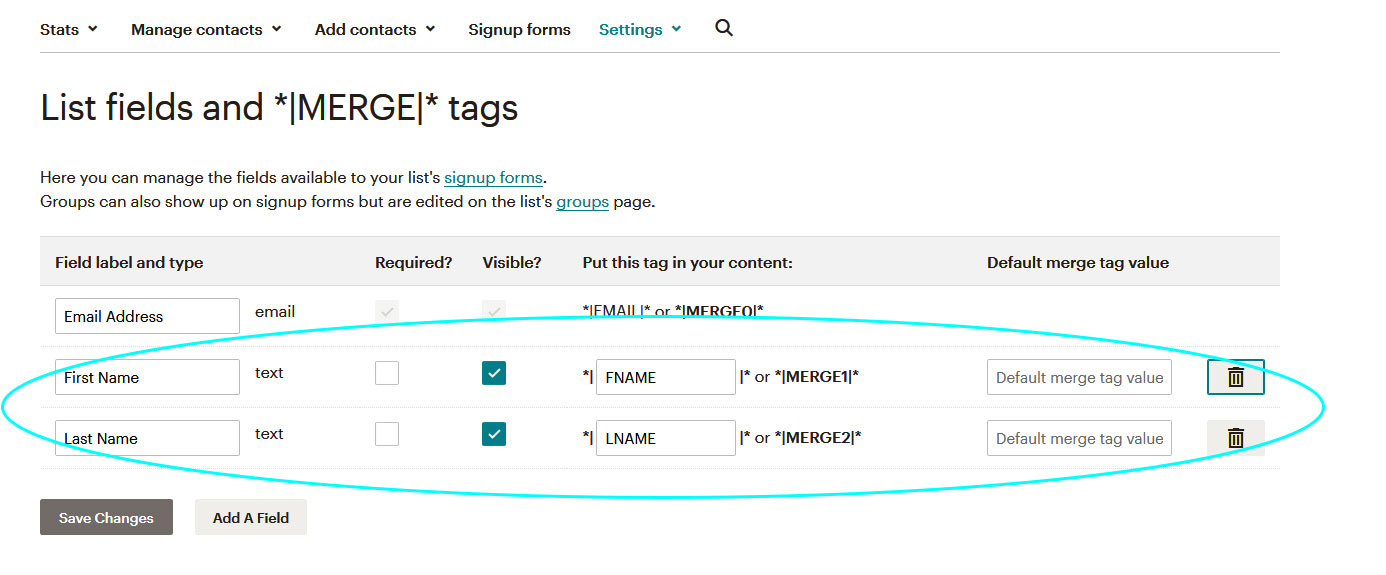
If you do not want to do that, then you need to make sure that your optin is collecting all of the fields that you see on that screen.