
All Kadence Themes have the same initial setup and install. To view these steps, head over here. Then when complete head back here for your theme specific tutorials.
No Posts Found
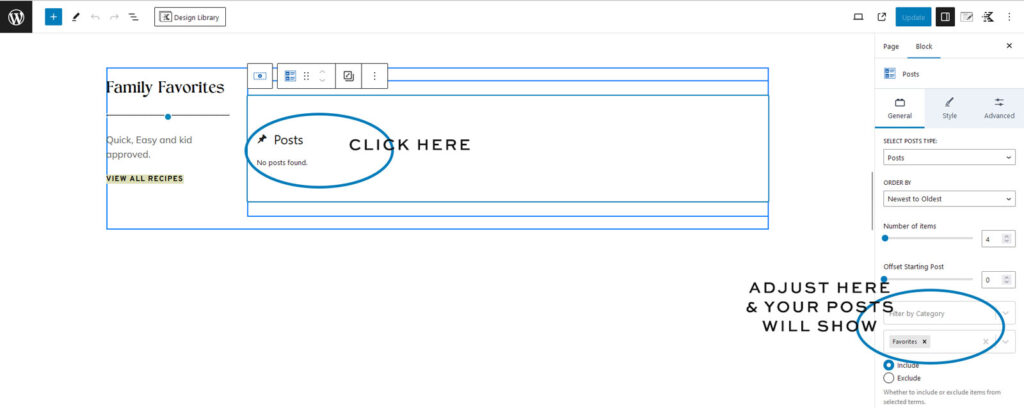
Import Issue
This happens, when permalinks do not match up. Running the demo import again will not fix it. This is okay though, because you need to change each block to match your post categories or tags. The Fix: go to any block that has “No Posts” click on it and then over in the right of the editor, choose what category or tag you want to show.
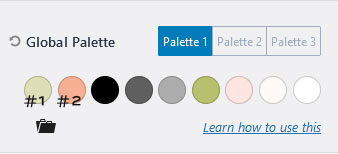
IMPORTANT Color Palette Notes
Hello Blogger has custom code that adds a 1/2 highlight to certain elements. Because you can not adjust this directly in your editor we have tied it to the #1 & #2 spot in your color palette. Keep this in mind when choosing your specific colors.
MEET JENNIFER
Advanced Styling Options
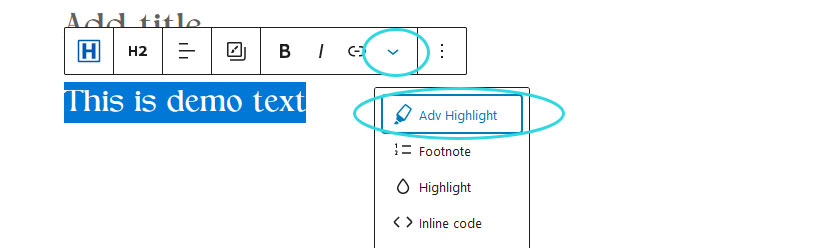
When using an Advanced Heading you can highlight any part of the wording, then add “Adv Highlight” from the dropdown select. We added code to make this a half highlight vs full height. If you want to use the half highlight vs full height, follow the below.
** We only styled the color of the line and the height. You can choose any font color, by clicking on the Advanced Highlight Settings that is at the bottom of the Style tab, to the right in the editor.
STEP 1 – Add some text, make sure it is the “Heading ADV” style.
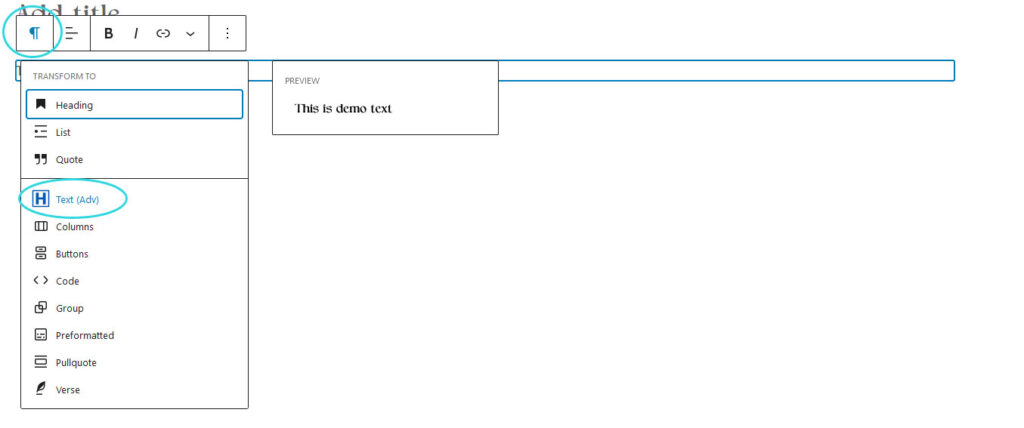
STEP 2 – Type the wording, then highlight the part you want underlined. Select the dropdown arrow and choose “ADV Highlight”
STEP 3 – Add the Advanced CSS code.
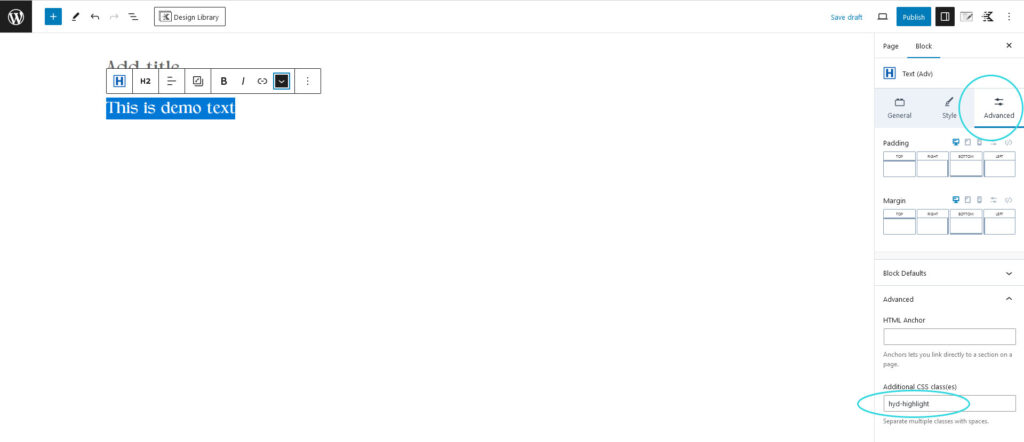
hyd-highlight
To Remove Styling: Simply remover the hyd-highlight from the Advanced CSS spot and the highlight will return to the standard form.

STEP 1 – Add a Spacer/Divider block. Adjust the color in the settings to be black. Your arrow tip will be black. The arrow will automatically go to 130% width.
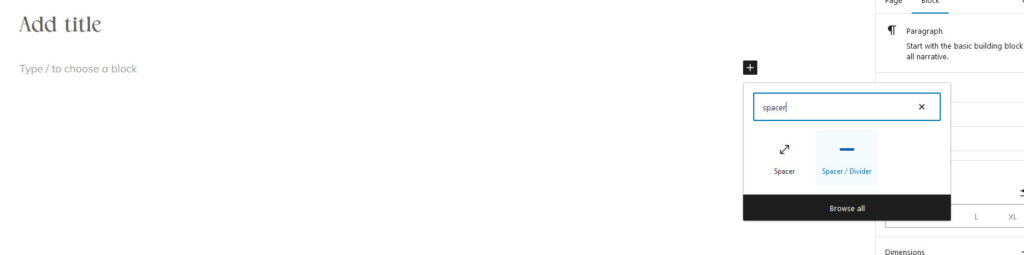
STEP 2 – Over in the settings for the block click the Advanced Tab and add either a left or right arrow in the Advanced CSS spot
hyd-larrow – left arrow
hyd-rarrow – right arrow
hyd-rarrows – short right arrow (100% width)
*Recommended to hide arrows on mobile if the layout does not make sense with the arrow direction. To hide on mobile, click the spacer/divider block. Then in the editor on right, click the Advanced Tab, then toggle on “Hide on Mobile”
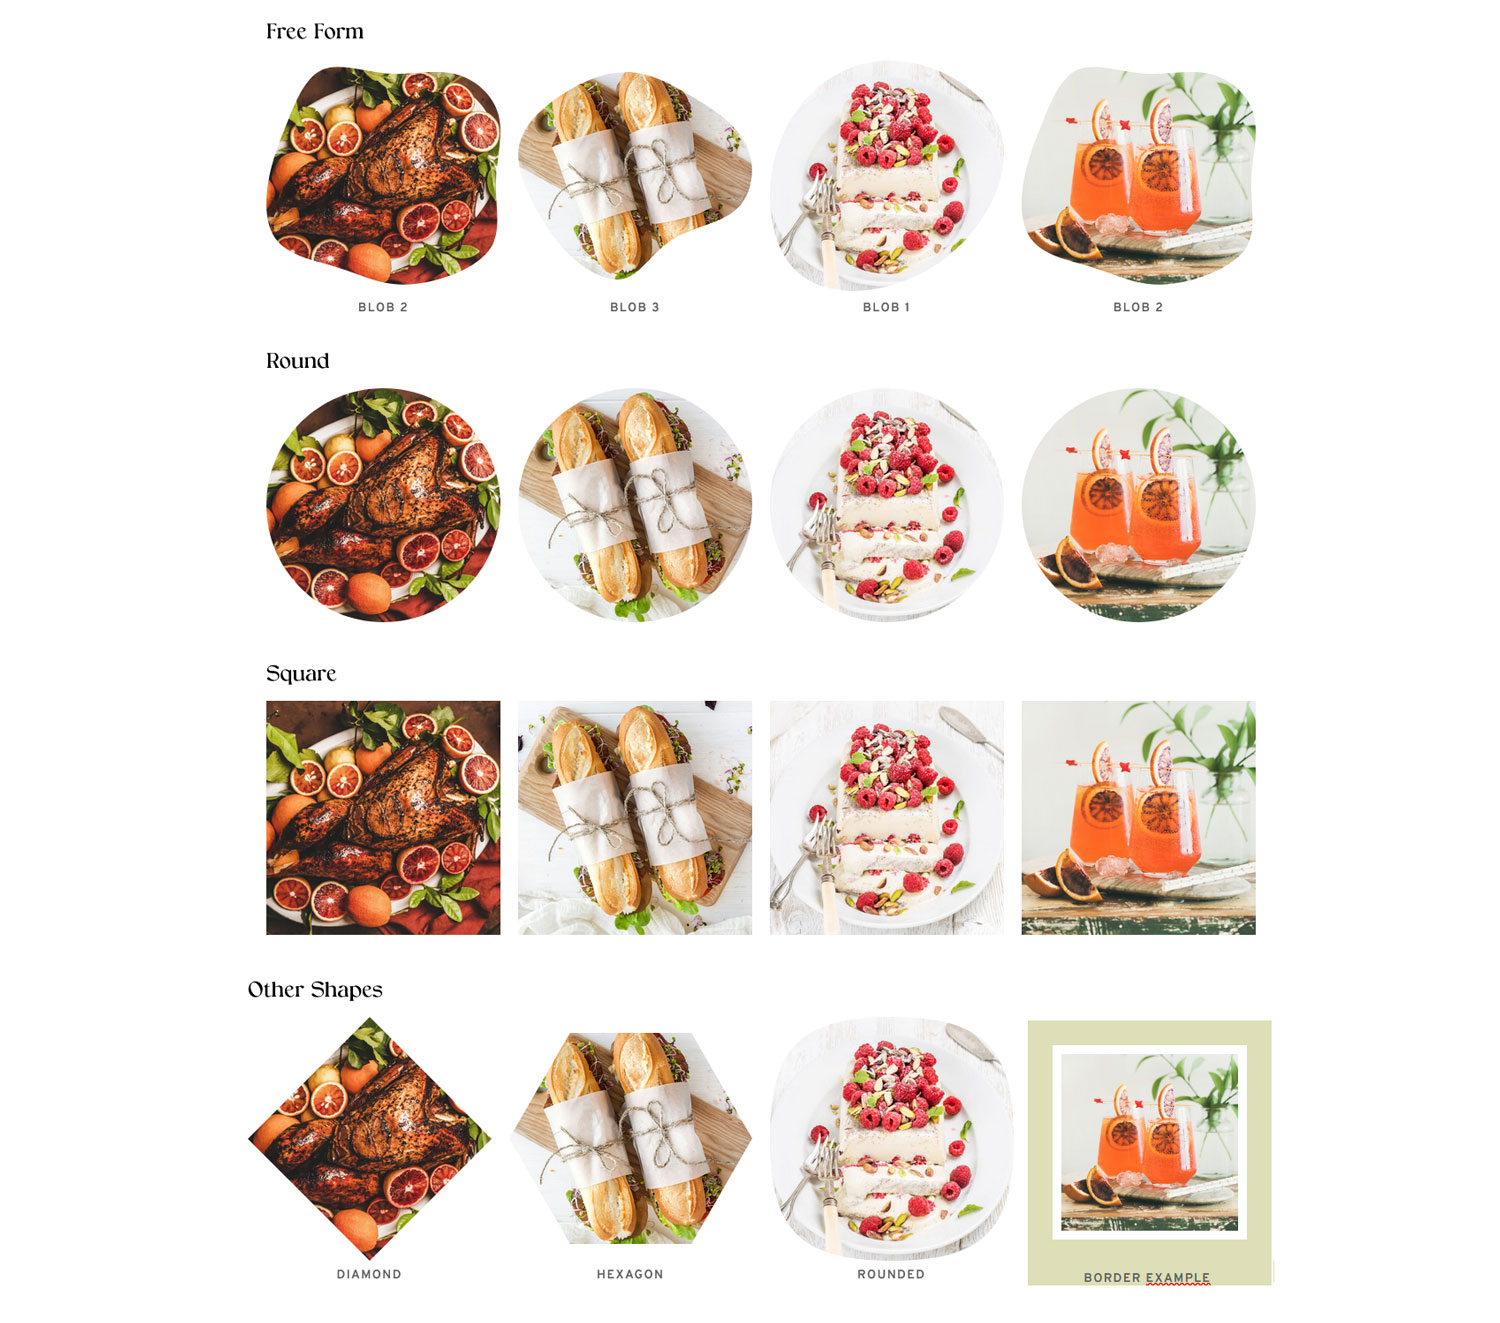
The Shapes…
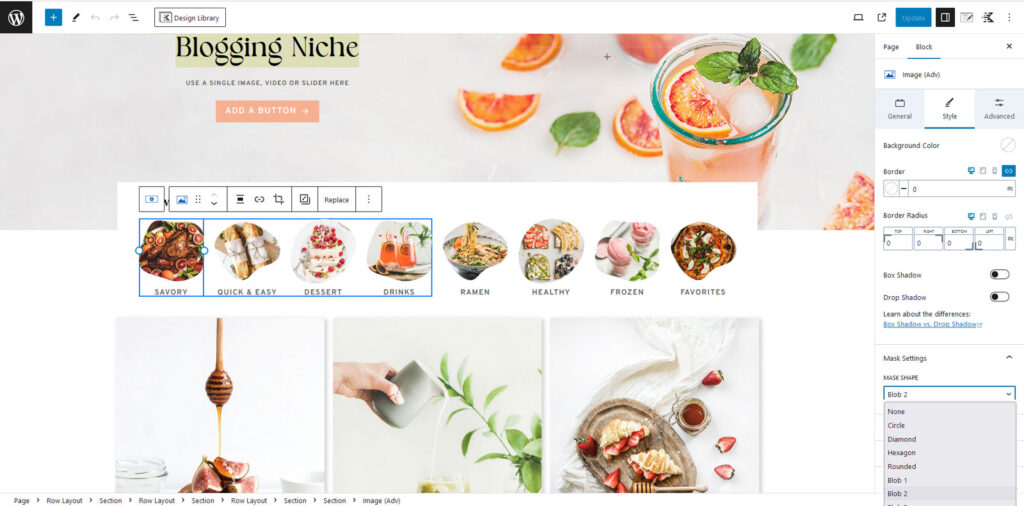
The Featured Links
Click on the item you want to change. Then in the editor click the Style Tab. Then scroll to where it says Mask Settings. Click the dropdown and select your shape.
To add a border to an item click on the item, then in the editor on the right click the “Style Tab”. Where it says Border add your width, then select a color. This works best when your items are on a background color so the border will show.
2 ways to add your link to the image. Click on the item you want to add a link to.
#1 – Click the link icon, add your link, then click the circle arrow to be sure it is added.

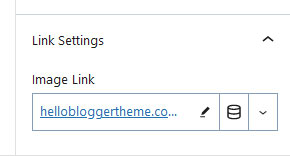
#2 – over in the editor, click the general tab, then at the very bottom of that tab is the Link Settings.
*** To link the wording below, highlight the wording, click on the “link” icon and follow the steps in #1.
The easiest way to do this will be to go to the library and select the number you want. The library blocks will be adjusted for mobile devices and have the styling pre added to them. If you have a certain # you need and it is not in the library, please reach out and we can help.
If you need double layers, add the library blocks with the correct number 2 times.
Library includes:
8 Blocks
6 Blocks
6 Blocks with side intro
5 Blocks
4 Blocks
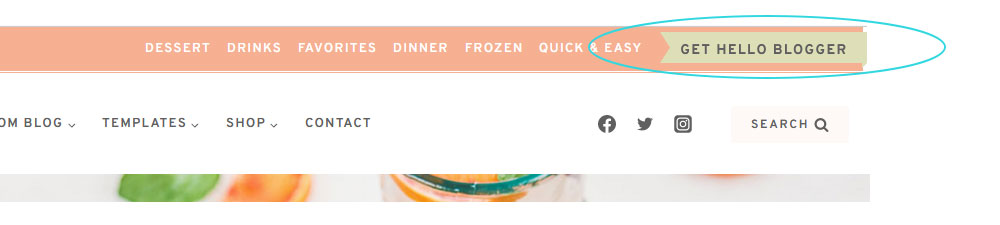
Top Menu Bar
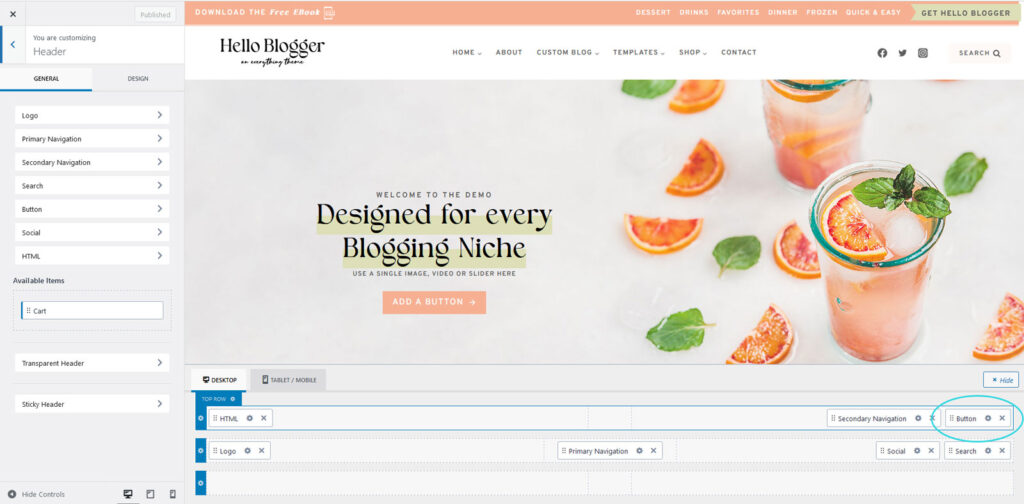
The styling of the button will automatically appear. All that you need to do is adjust the color, wording and link.
Step #1: Go to your Customizer > Header > Then in the bottom right corner, click the button settings.
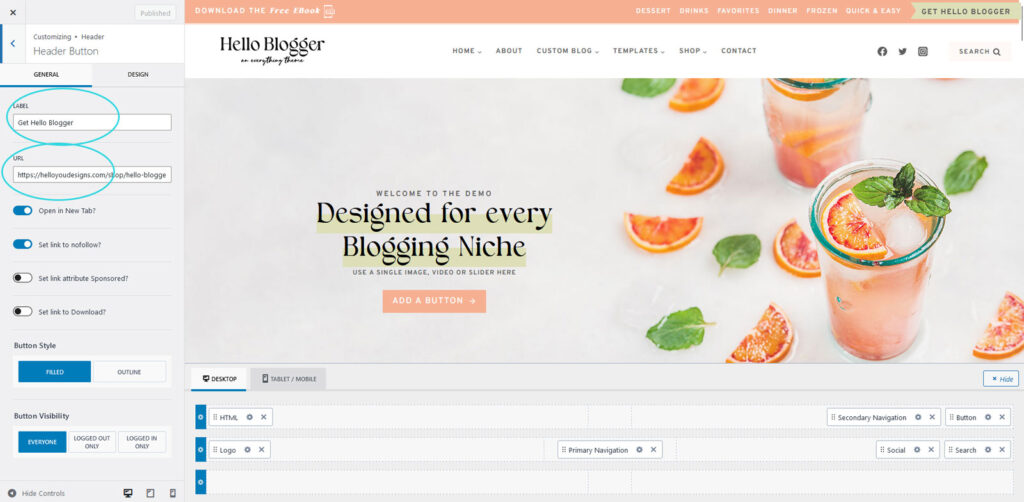
Step #2 : Change your Wording and link.
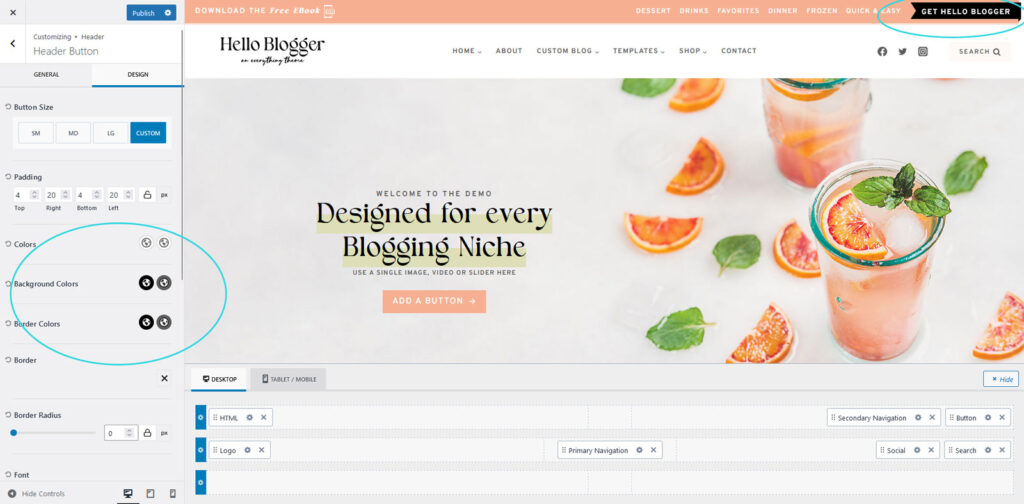
Step #3: Change your colors – Click on the Design tab and select your colors.
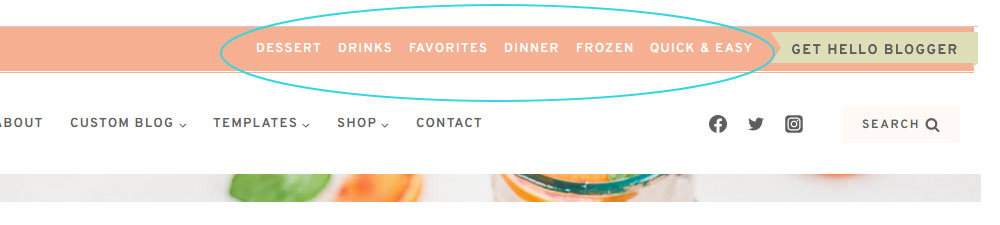
Step #1: Go To Appearance > Menus > Add New and create the menu you want to show in this spot. Then be sure to assign this menu to the Secondary Navigation Spot.
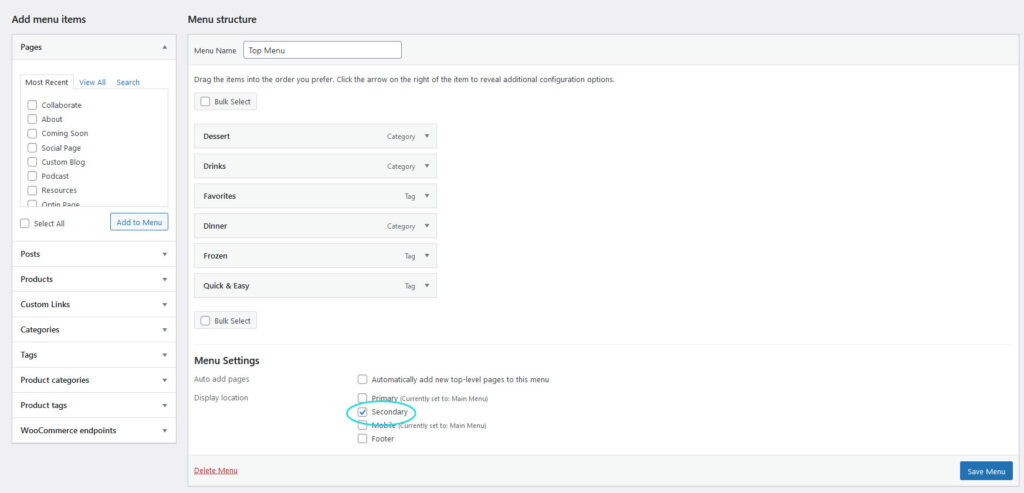
Step #2: Go to Customizer > Header > Then drag the Secondary Menu widget to the location you want it to show. You can have it left, right, or even center.
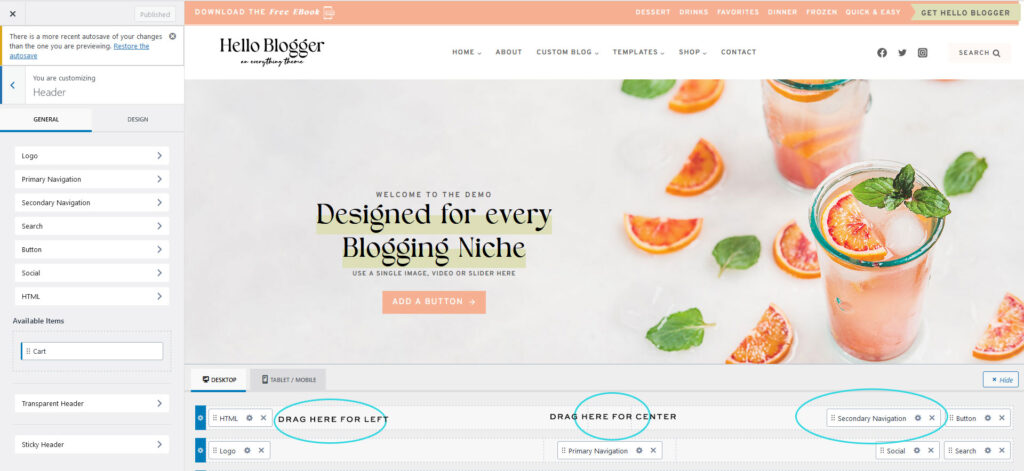
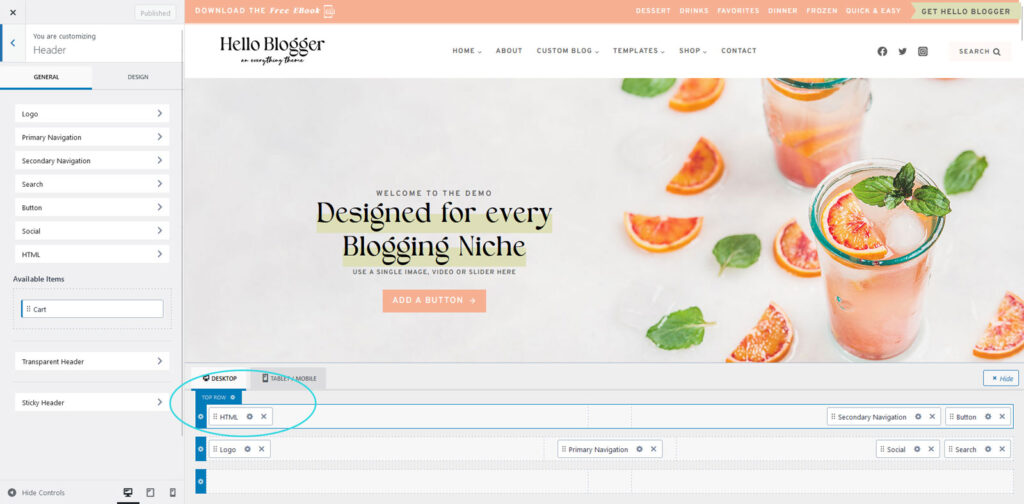
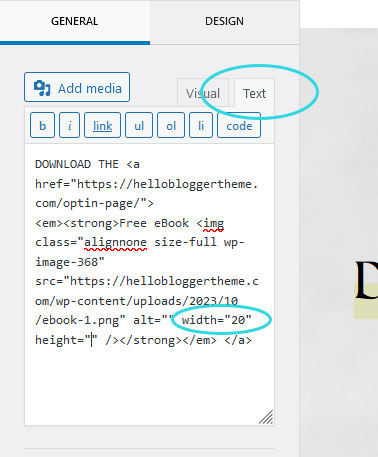
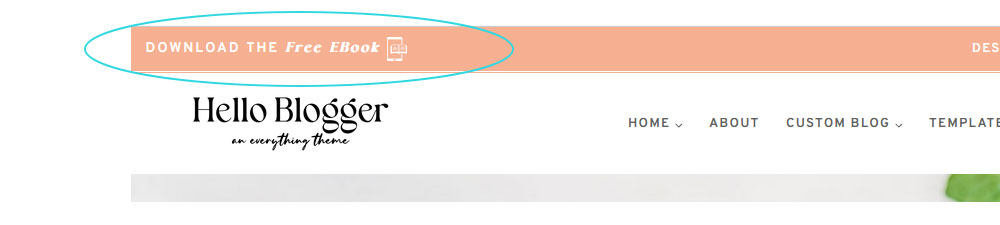
Step #1: Go to customizer > Header > Select HTML in the bottom Left of the header bars.
Step #2: Add your wording, then add your media item. You can’t see the tablet icon in the example, because it is white on a transparent background. After you add your wording, highlight what you want to be a link, click the link icon and set your link.
**Italics will default to your Header Font. That is how we have 2 font styles in the demo.
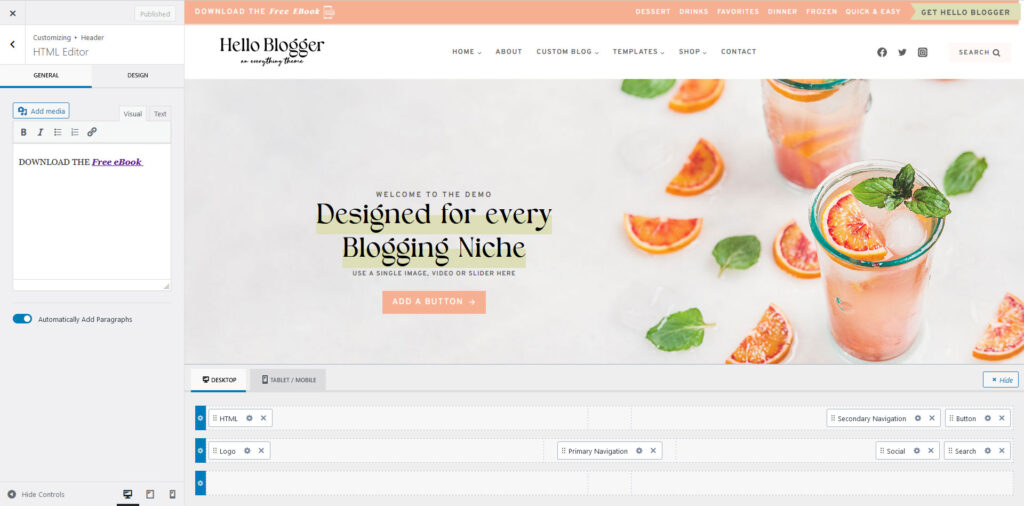
Step #3: Adjust your icon size. The easiest way is to make sure it is the correct height when you load the media in. The demo is using a width of 20px and height by 25px. If you did not pre-size the image, click the text tab. Then find the width=” ” and change that number to 20, or whatever # your image looks best at.
The Button
The Secondary Navigation
The Optin Link
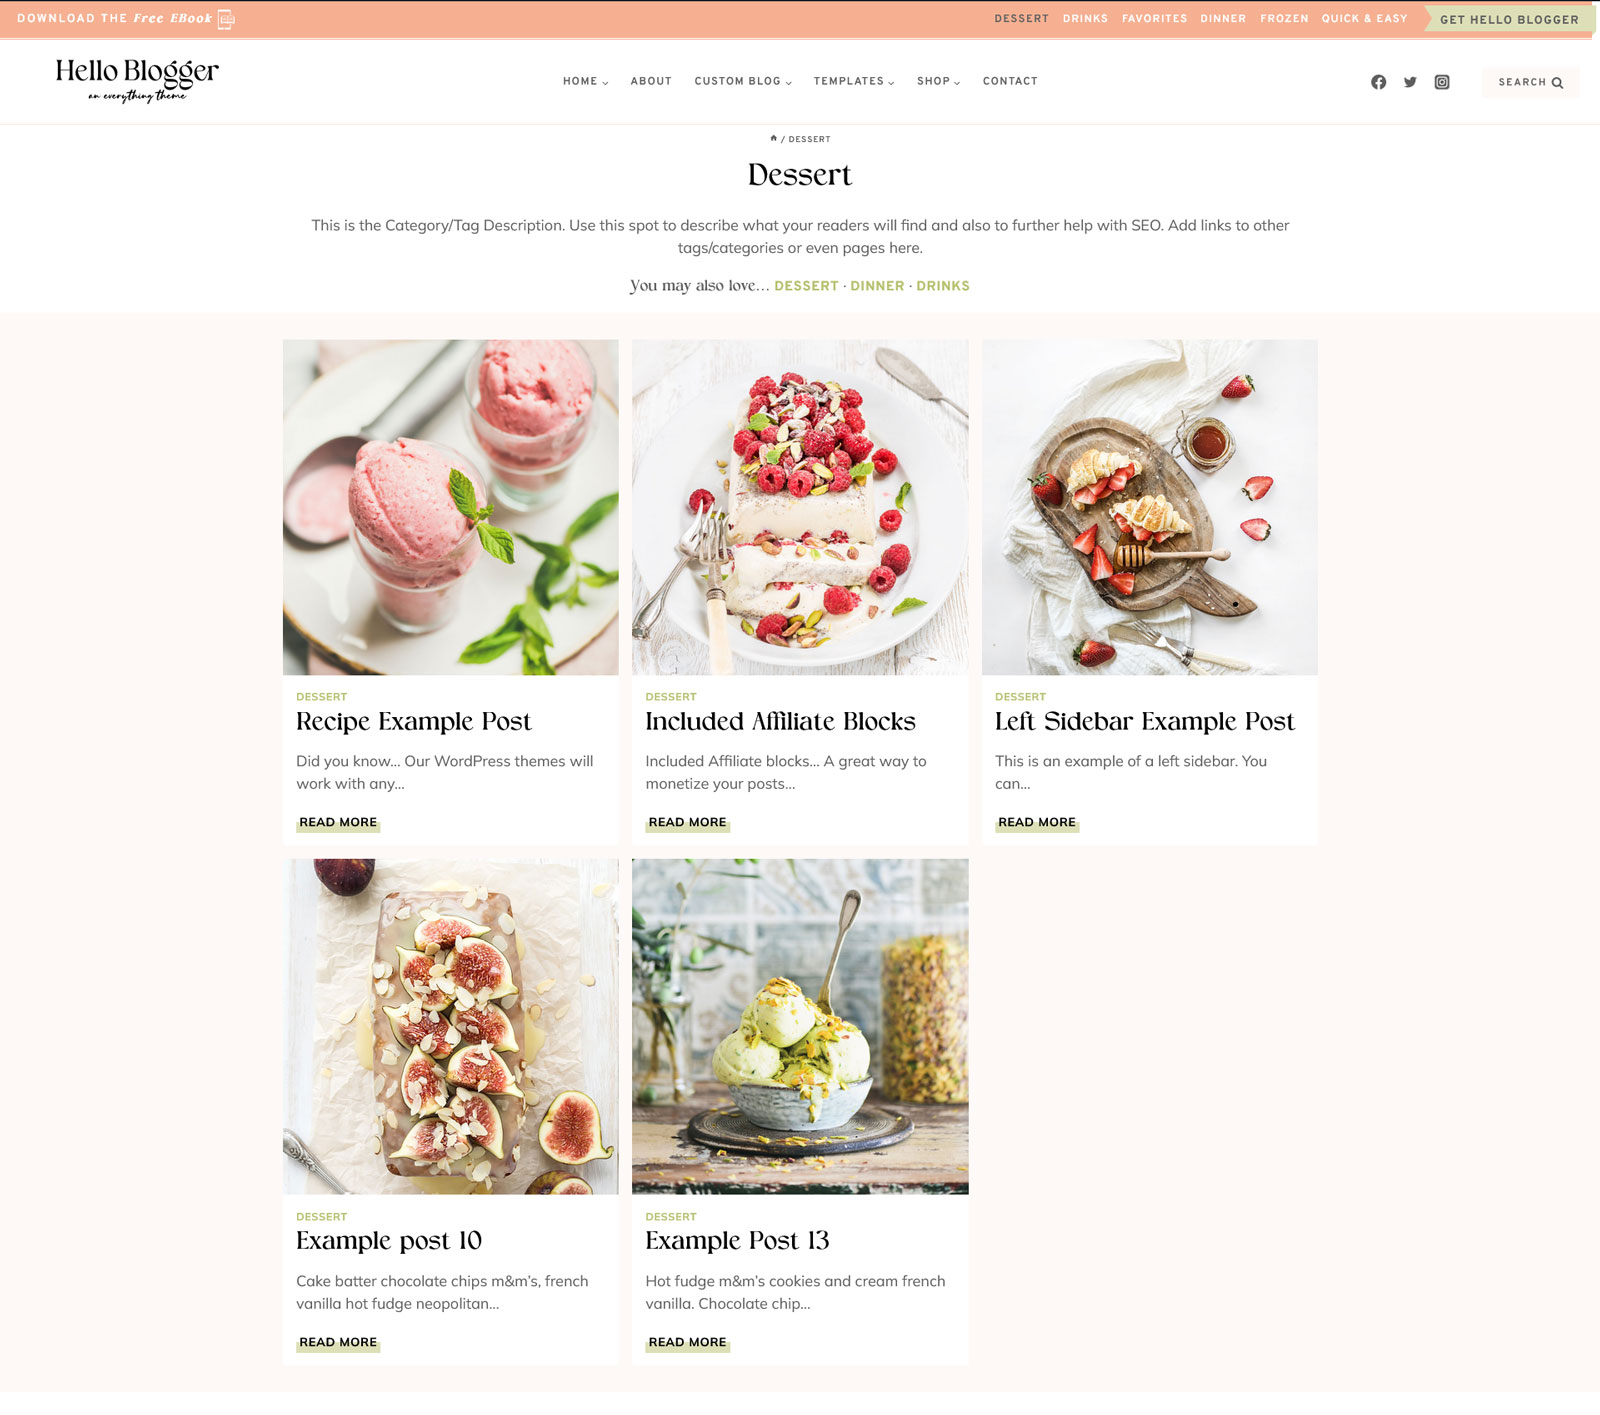
Category & Tag Archives
You can create a custom description for both your Category and Tag archives. The Hello Blogger theme allows HTML in the description spot.
Step #1: Go to Posts > Click on Categories or Tags > Then click Edit on the archive you want to add a description to.
Step #2: In the Description box, add your description. If you would like to add links, it will need to be with HTML. The Span below will default to your header font and the links to your Primary Navigation font. Copy/paste as many of these as you like.
Title: You may also love….
<span>You may also love...</span> The Link code: Notice the · at the end. Remove for your last item, or change to something different for a spacer.
<a href="YOUR LINK GOES HERE"> Dessert </a> · Full Demo Code:
<span>You may also love...</span> <a href="YOUR LINK HERE"> Dessert </a> · <a href="YOUR LINK HERE"> Dinner </a> · <a href="YOUR LINK HERE"> Drinks </a>